
#11: November
It’s hard to believe there is only one more wreath after this one! Boy how a year flies by!
Another thing that may also be hard to believe is that I would actually hang this wreath in my house. I think my mother actually would too.
So there’s some back story to this I feel as though everyone needs to know. My brother, Parker, chews… Where I’m from its what people do. I had seen some “chew can wreaths” before, but I chose to put my own spin on these. I made two different types, one for my brother and another for his friends. I am choosing to post a tutorial for the latter because, guess what Parker is getting for Christmas…
That’s right, a “chew can wreath” with that little Mud on Her Boots twist.
So, here it goes:
What you’ll need:
Find someone who chews and ask them to save their can’s for you. And not just the can’s, you can use the plastic wrapping and the cardboard packaging too! Depending on the size wreath you choose to make either 20 or 25 cans will be used. Make sure the insides do not have a lot of residue inside.
Just a few tips: Try and use a few different brands and flavors to give the wreath some color. Plus, Grizzly currently has a pretty cool looking can with some florescent orange and camo, which would be a great touch to this wreath.
1 12 inch or 14 inch wire wreath frame from Hobby Lobby. The smaller one is $4 and the larger is $5
Green Floral Wire (I have the kind with the cutter already attached)
Drill and an 1/8 inch drill bit

My handy tools!
Hot glue gun and 4 glue sticks
Instructions:
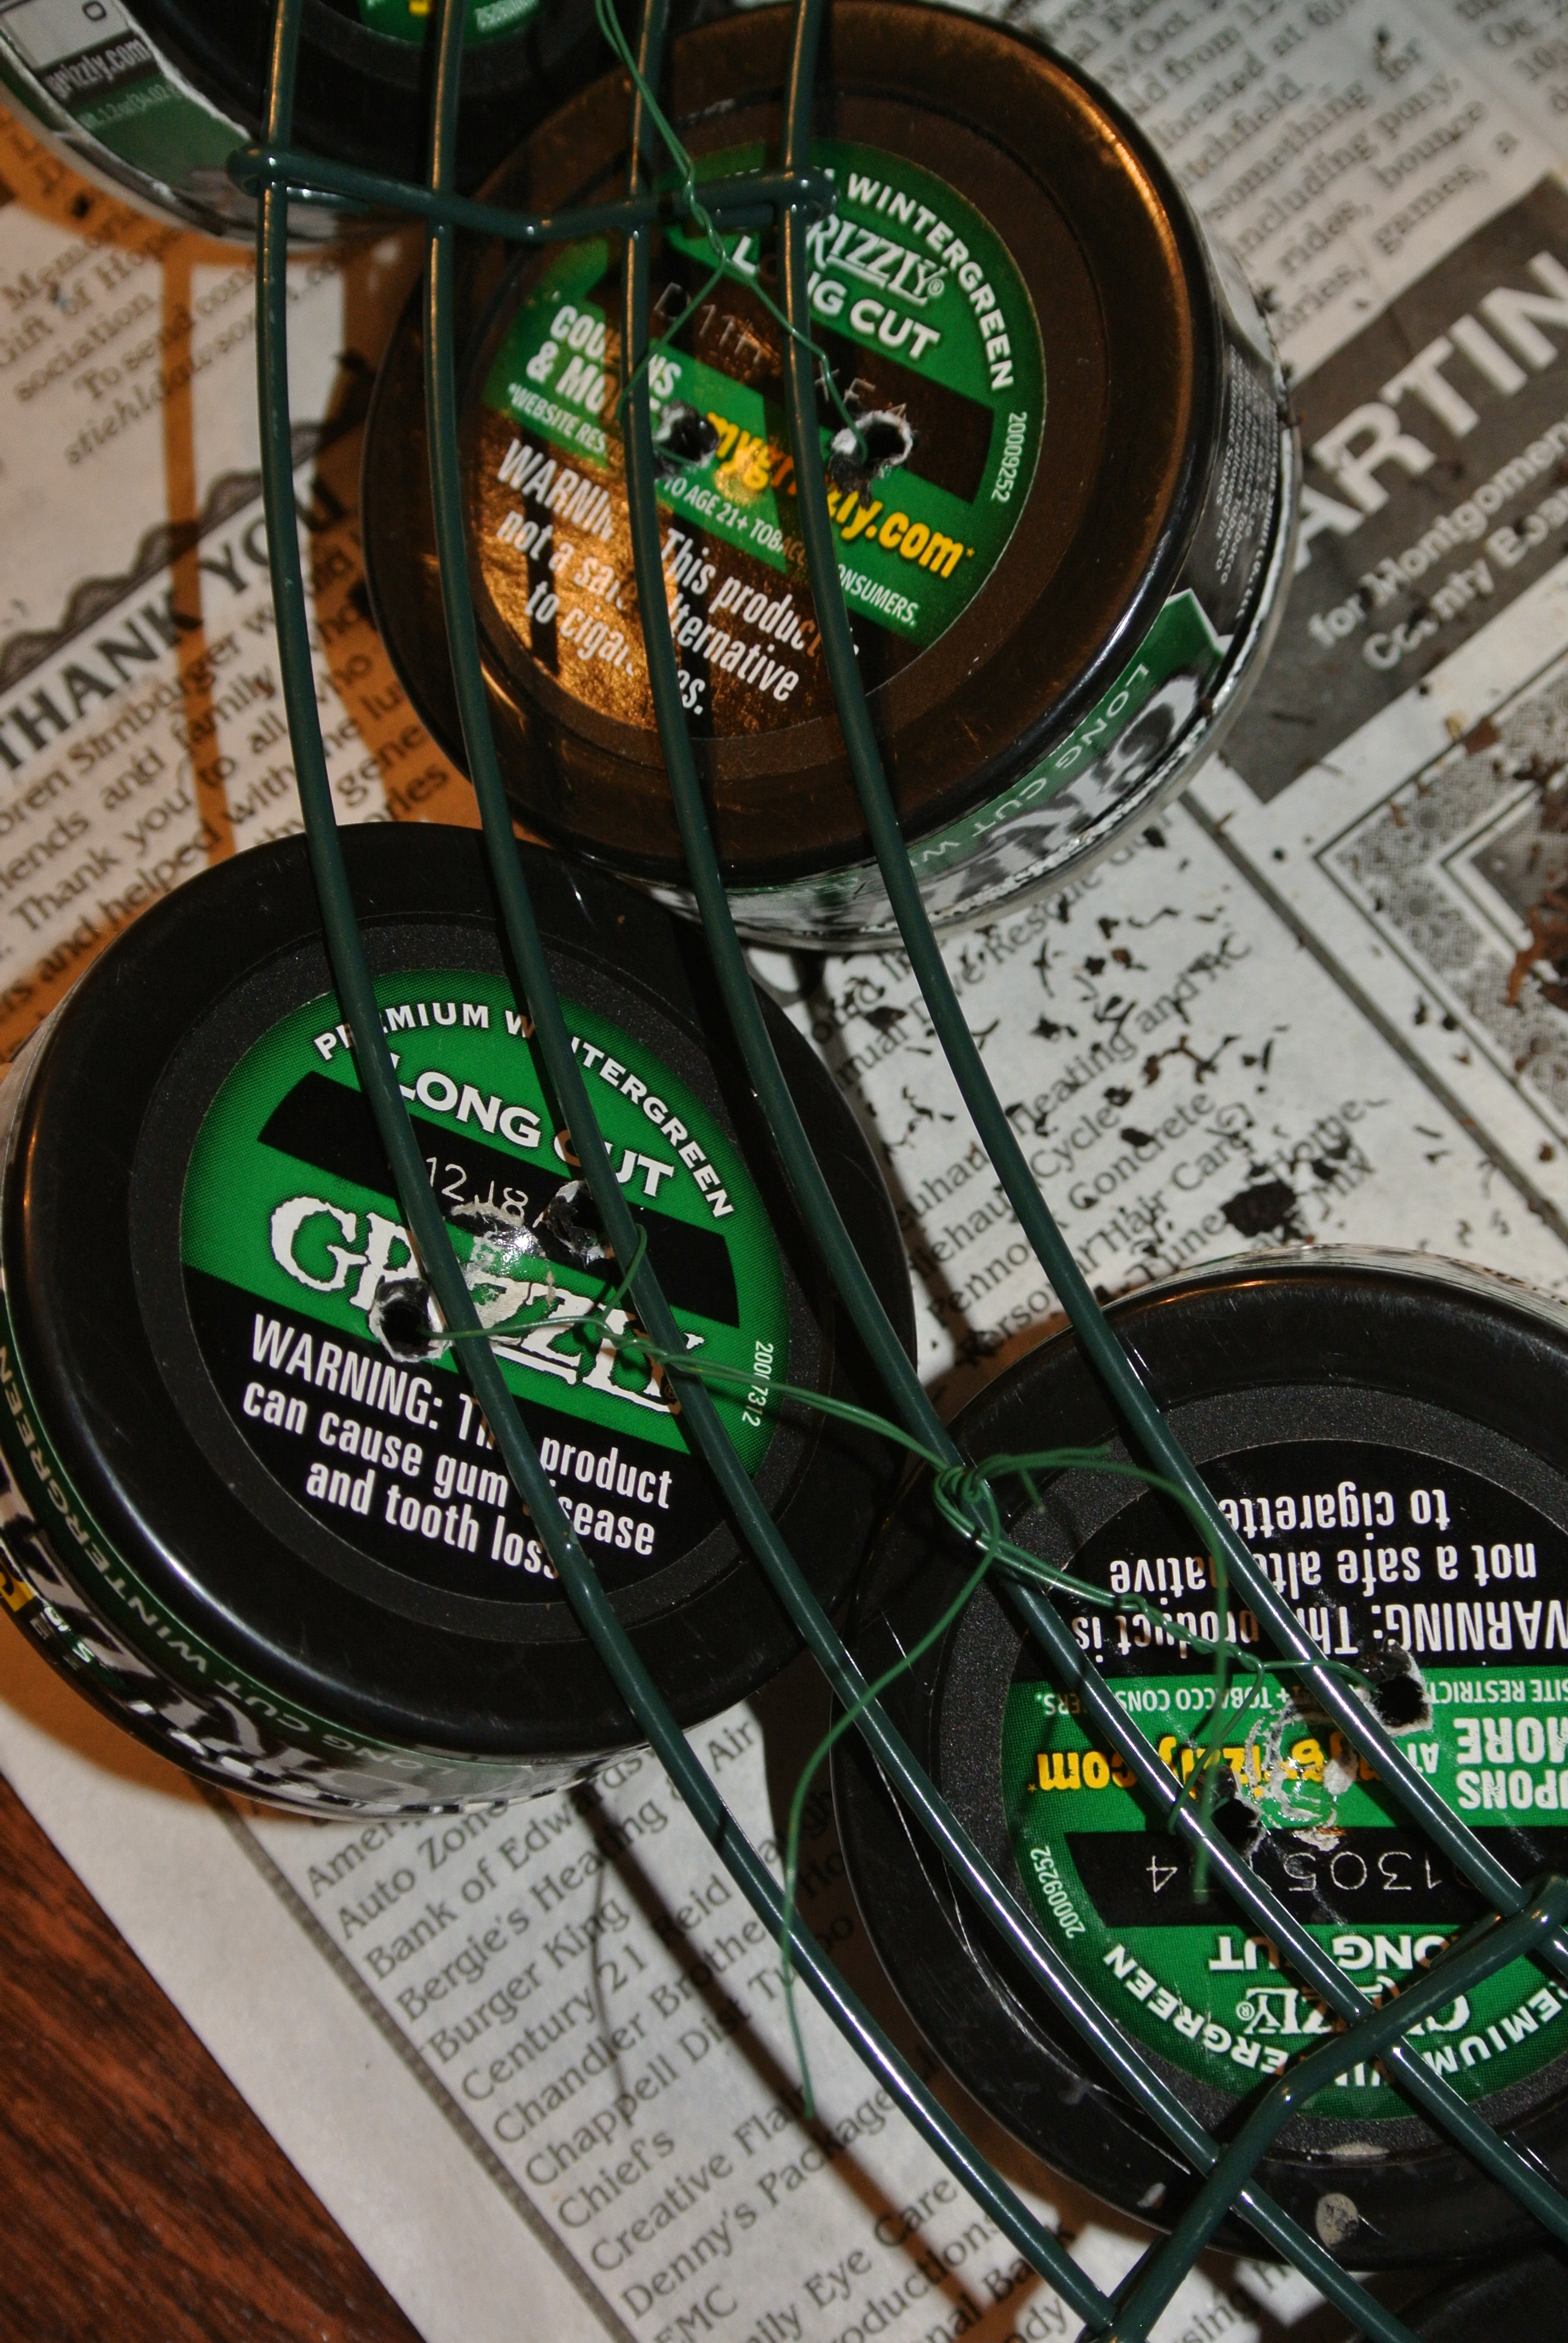
Drill 2 holes in the center of all of the chew cans. One on one side of the small circle on the inside of the can and another directly across from the first hole.
Next, cut the floral wires 6 inches long and take the lid off of the chew can. Now, feed one end of the wire in one hole of the chew can through the bottom and pop it out the bottom of the chew can through the other hole and put the lid back on.

The cans with the holes drilled and the wires fed through.
Now its time to attach the can to the wreath! Since the wreath is 4 wires wide, use the wires as a twist tie the can to the outer two wires. For the next can twist tie it to the inner two wires. This gets the inner, outer rotation going. When you get the wreath full of cans, flip it over and twist all of the tails together to make sure they don’t wiggle around.
Rotating the cans; inner 2, outer 2.
Once the wreath is full of cans, start filling in the gaps with the extra “stuff.” I used the card board to cover some gaps in the wreath and also cover some of the WARNINGS.

Filling the wreath in.
For the hanger, I just used the wire base of the wreath.
Here’s what my finished product looks like! As you can see, it is perfect for any guy who chews.

The finished product.
Totaloo!
Abby Rose
